Multiple fade ins
Prezi enables you to ‘fade in’ images, videos or text in your presentation. The option to fade in is very useful, but can be difficult to use at the same time. One of the biggest challenges is multiple fade ins in one frame as you can only select the image on top. We wouldn’t be Mr.Prezident if we didn’t find a solution for this problem.
1. Choose your images
Make sure they are the same size. In this example we are going to use squares with different colours.
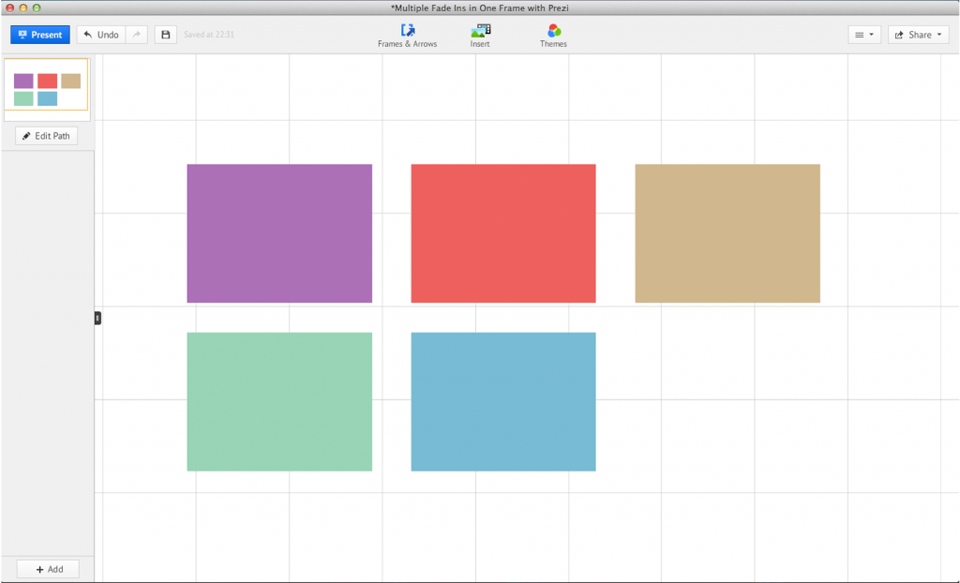
2. Put all images on top of each other
Start with the image you want to show first and place the other images in the order you want on top. Select an image, right click on your mouse and choose ‘bring to front’. Do this for every image.

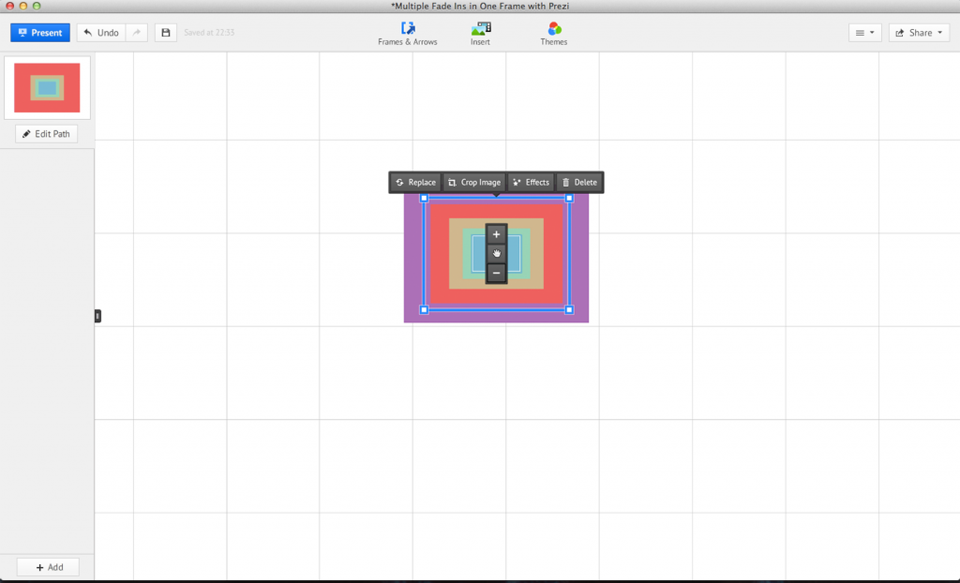
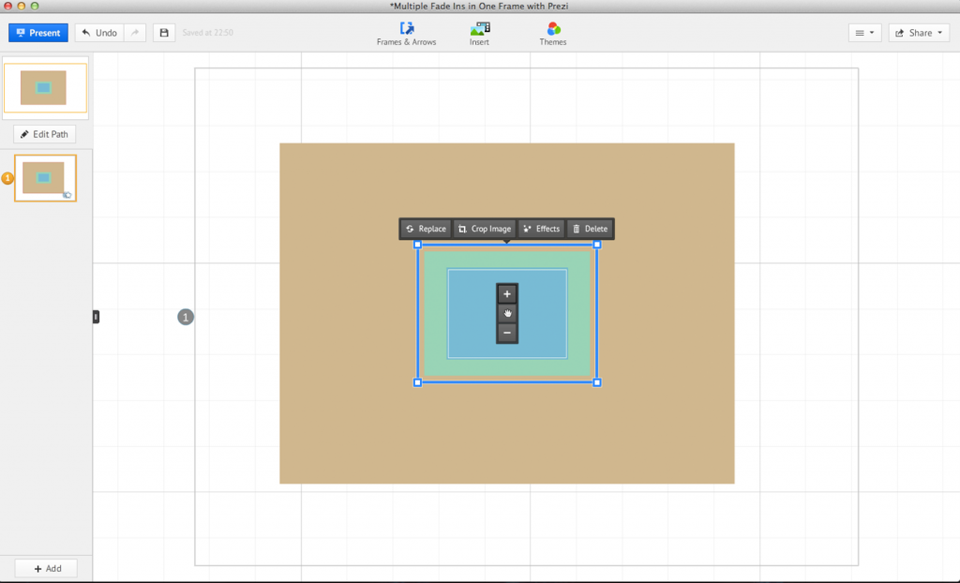
3. Make a pyramid
Select an image and use the minus (-) option. In this example we have 5 images, select the image on top, right click, click minus (-) 4 times. Select the second image and click minus (-) 3 times, for the third image you click 2 times and the fourth only 1 time. We leave the image on the bottom as it is.
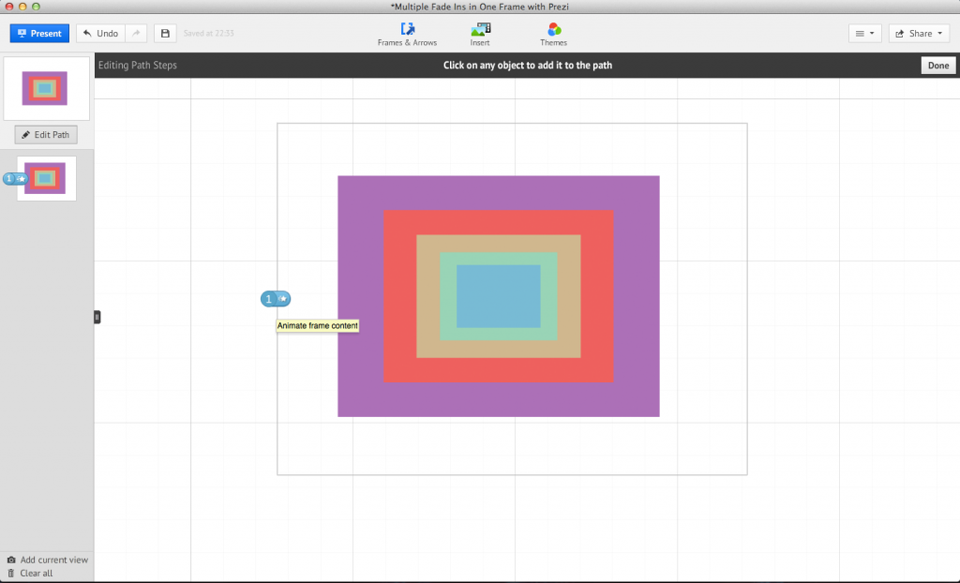
4. Fade in!
Put your images in a frame and add it to your path. Press ‘edit path’ and use the little star which is next to the ‘path-step’, select ‘animate frame content’.
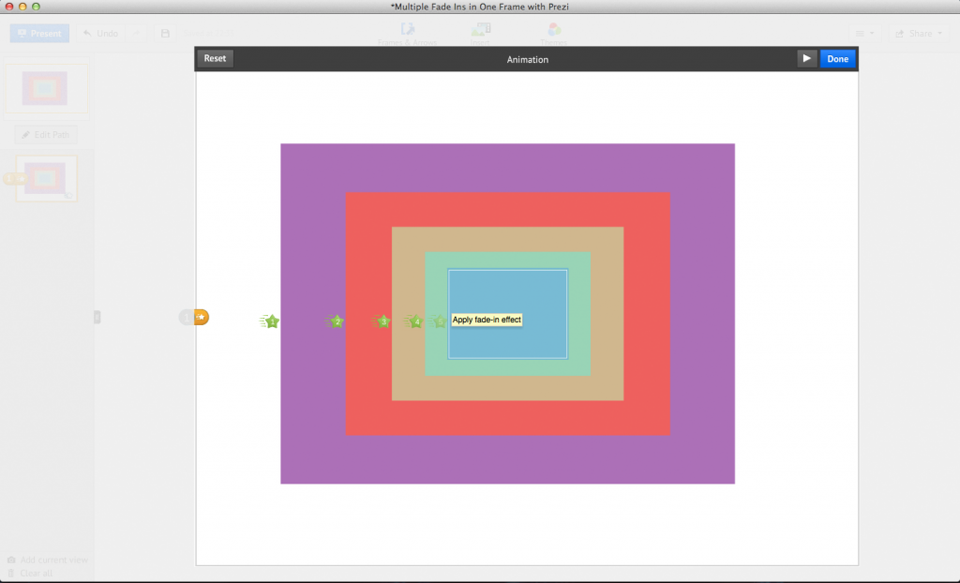
5. Put them in the right order of appearance
Select the biggest image first and work your way to the smallest one. Important is to select each image. When done, press ‘done’ twice.
6. Final step
At this point all images need to have the same size again. Start with the second biggest image, select it, right click and use the plus (+) option as much as you used the minus (-) option. Repeat for every image, working your way up!
If you have any further questions feel free to contact us!